Make a chip ring
Did you know you can stack chips to create a ring? You don’t need any glue or tools – just the right technique.
Get started

Step 1
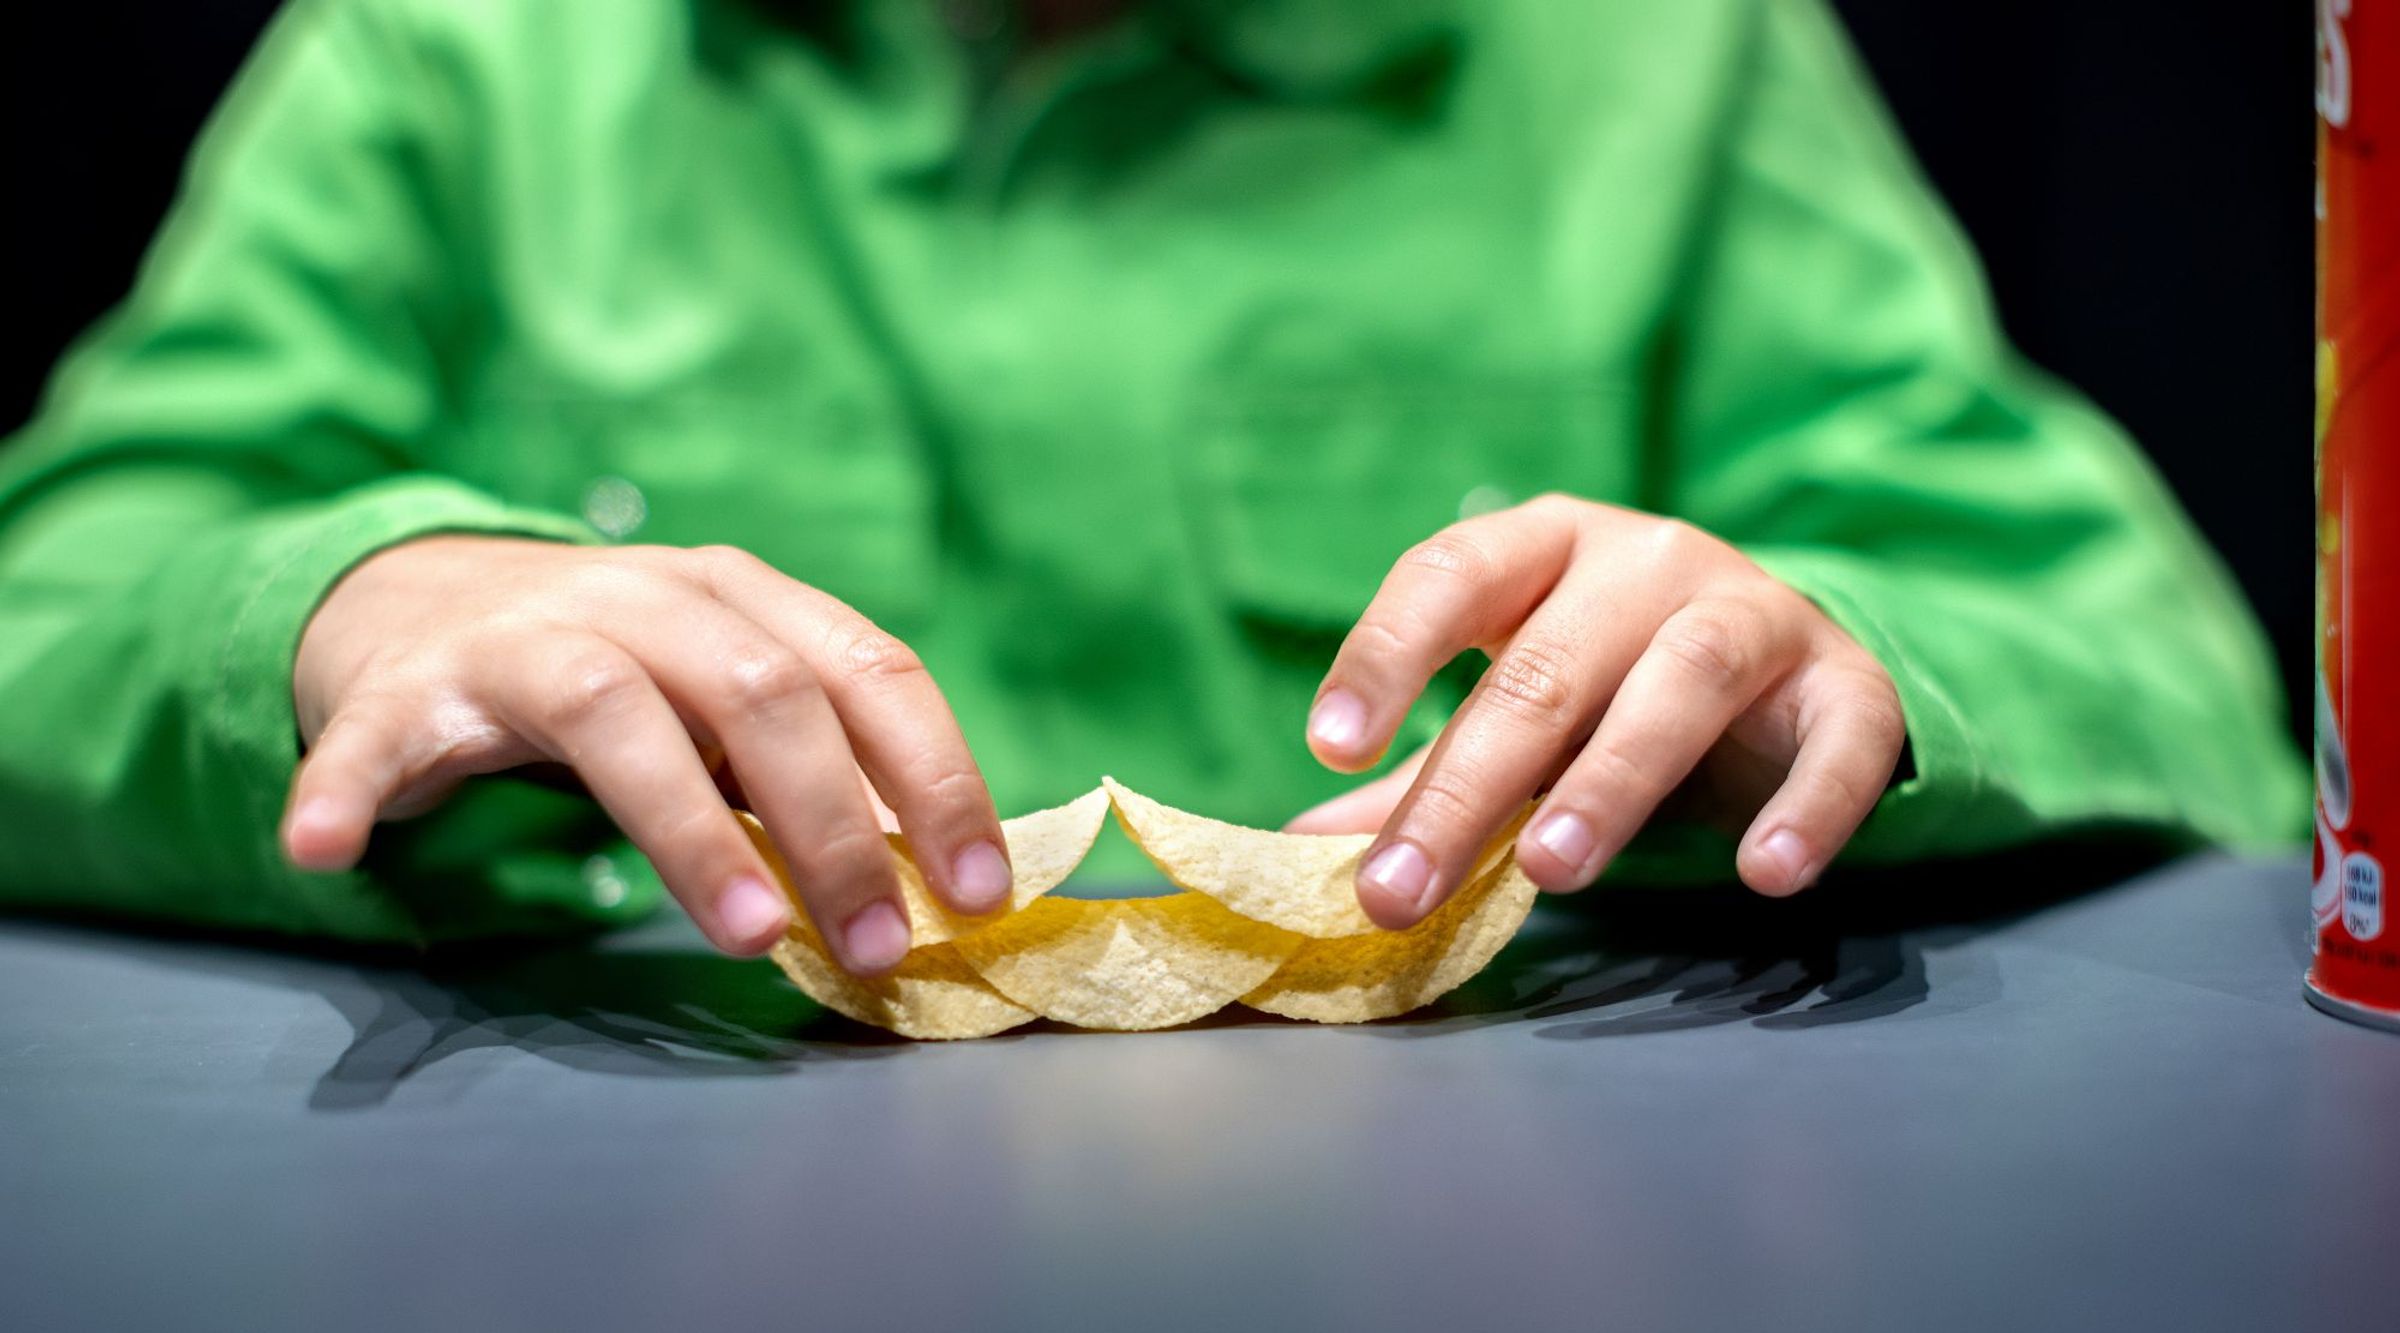
Begin by creating the base of the chip ring – you’ll need three chips. Make sure you place the chips with their hollow side facing downwards.
Lay two chips next to each other and place a third chip in the middle on top. Gently push the chips together to close any gaps. The ends of the first two chips will now point slightly more upwards – this is the beginning of your chip ring.
Step 2
Place the next two chips exactly side by side on the stack, so that the ends only just touch each other. Place the sixth chip precisely in the centre of these chips.
Tip: If your top structure falls down, place more chips at the base. The chips underneath provide support and keep your ring upright.
Step 3
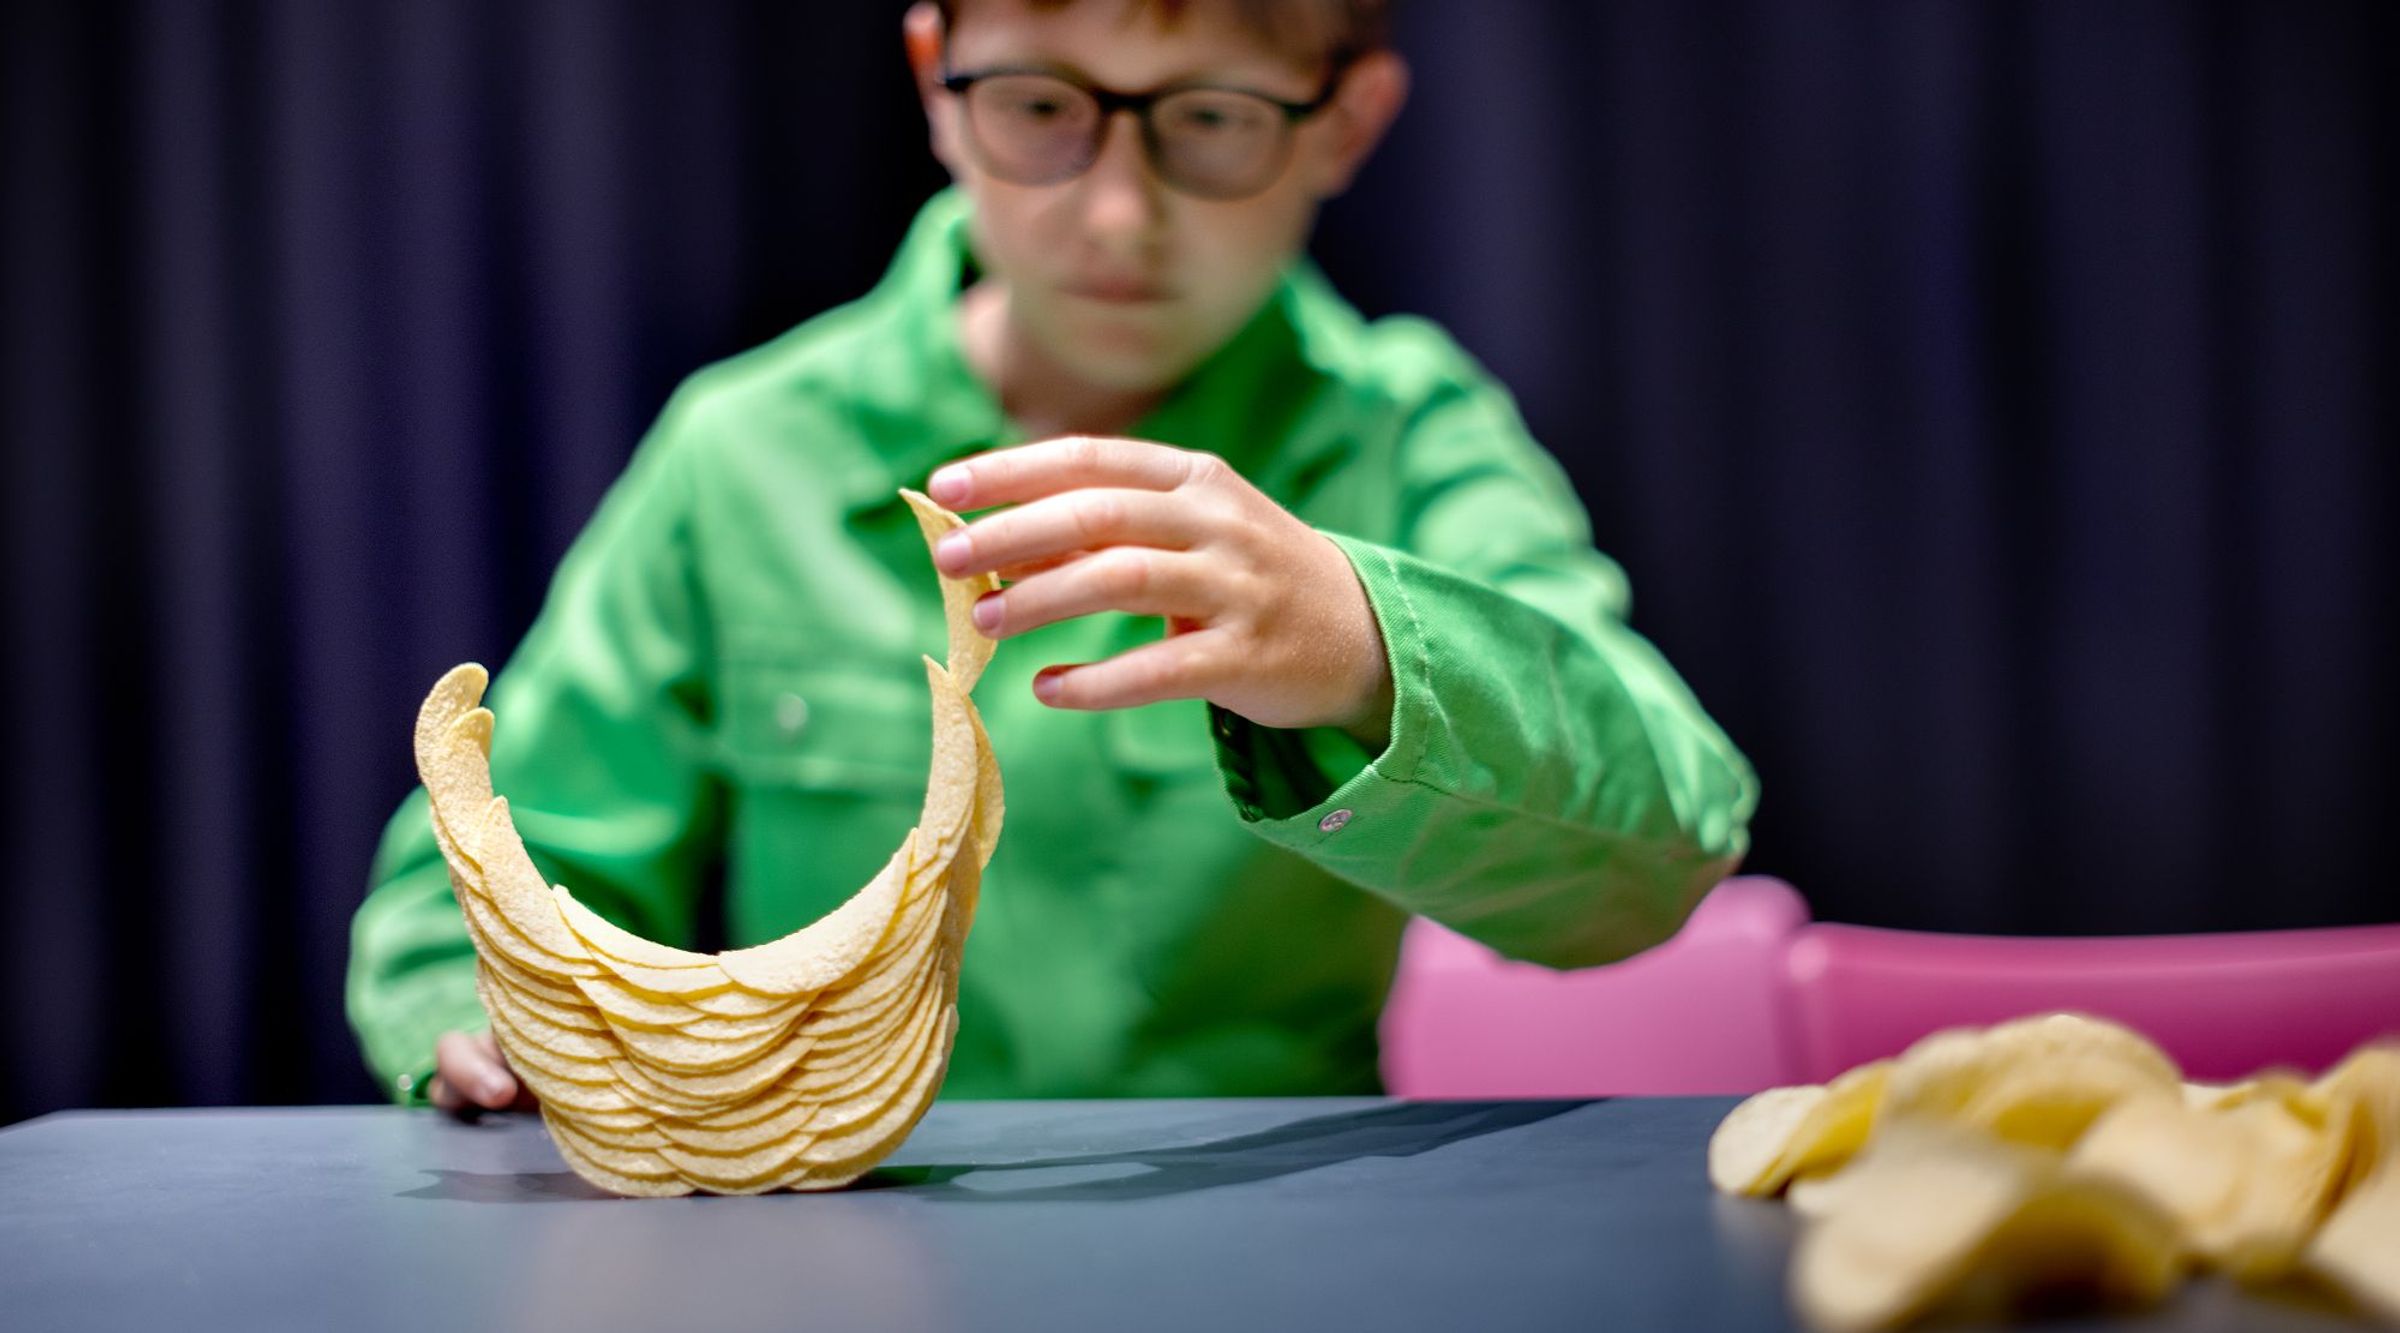
Continue building the ring by placing chips slightly further along the ends of the ring. Your ring will become larger (and higher).
Tip: If you’re struggling to place the chips the higher your ring becomes, stop stacking them. Instead, try to lodge them between the other chips on the sides.
Step 4
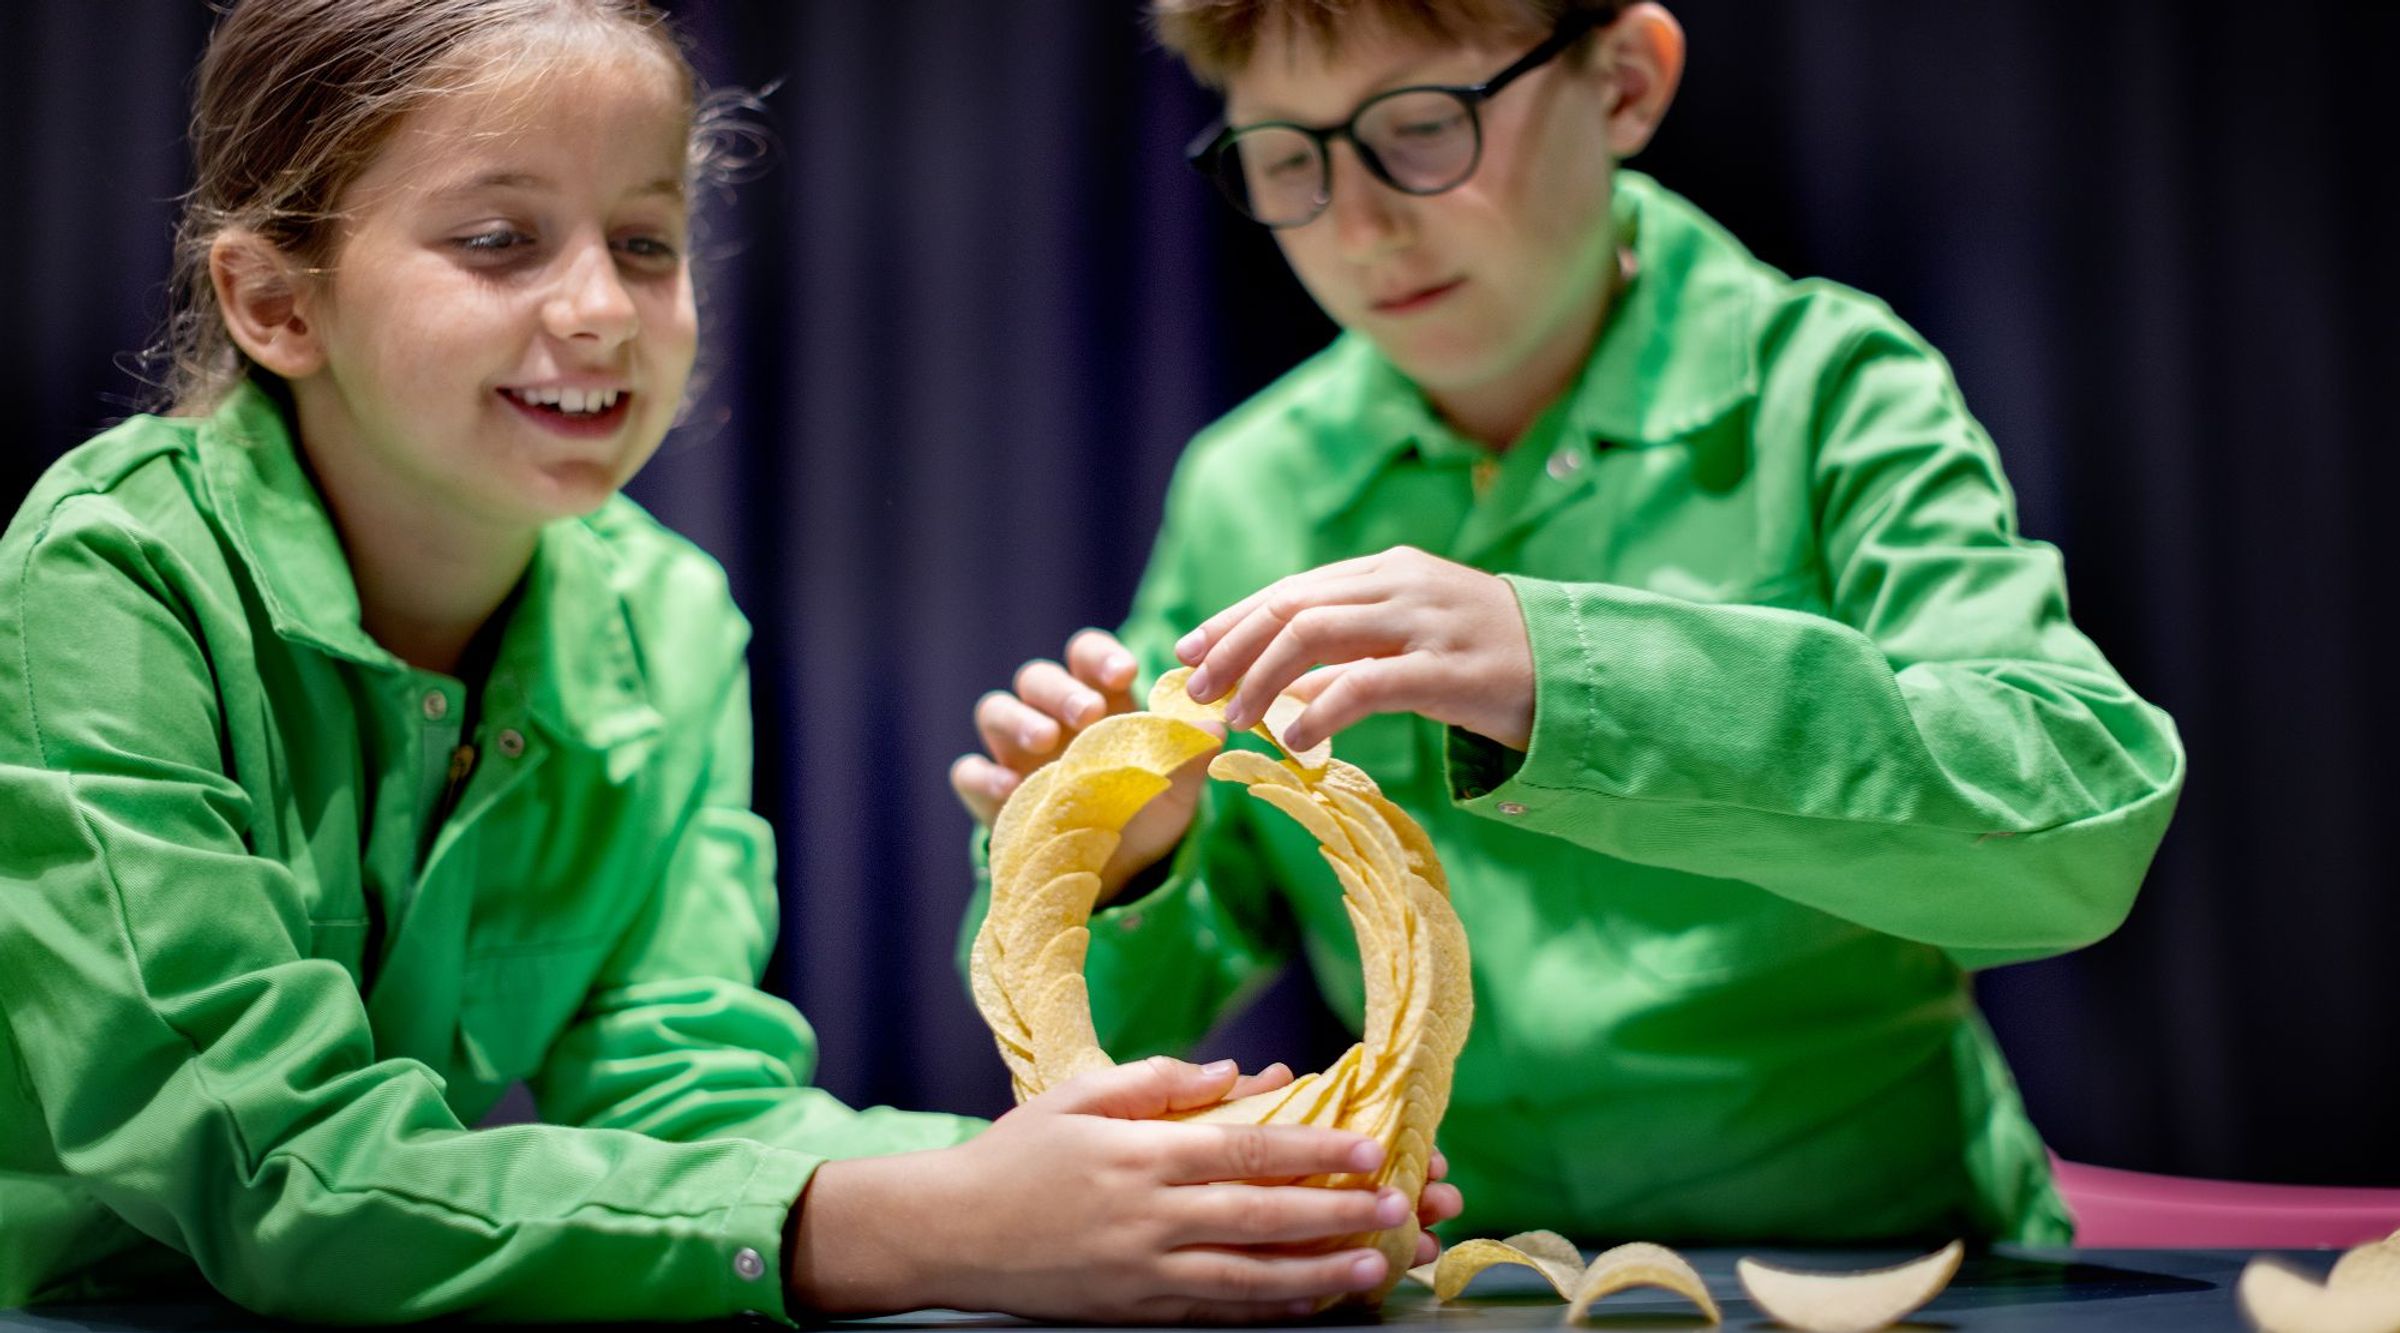
Try to complete the ring. Your ring will need to be sturdy to do this. To add more strength, add more layers of chips. But don’t overdo it! Stacking too many chips will make your ring too heavy.
Managed to make a complete ring? You can always try again.
Tired of building rings? Eat the one you just made!
What did you discover?
Objects can be stacked at an angle without falling. That’s because the structure’s centre of gravity is in the middle. The same happens with a book: if you place a book on the edge of a table and leave at least half of it on the table surface, it won’t fall. If you push the book further over the edge, it will fall to the ground. As these chips are round, they create a ring when stacked!